12 Airport Hacks That Can Help You Zip Through TSA
Let's be honest — travel is fun, but the ordeal of going through security screening isn't quite as enjoyable. The anticipation of a trip can be thrilling, whether you're going to explore one of California's widest stretches of beach or heading to a hill town in Italy that Rick Steves thinks is the most underrated. Think of all that planning — researching destinations, deciding where and when to go, and then making the bookings. Getting to the airport adds to that bubbling excitement, the realization that the trip is finally happening. But after dropping off your luggage, the joy of travel can dissipate as a sinking sensation in your stomach takes hold.
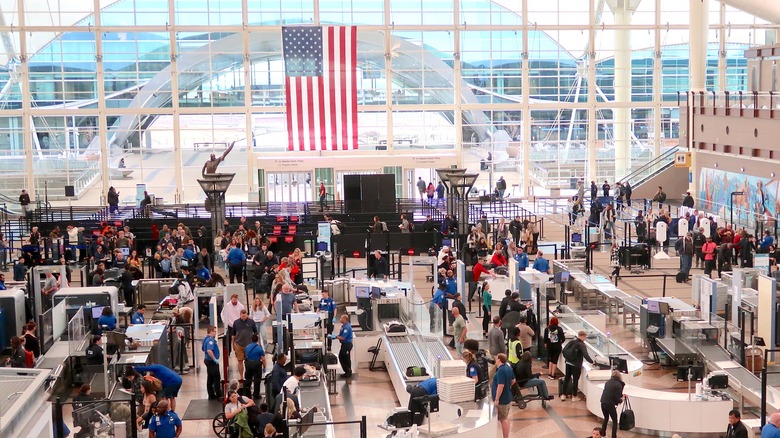
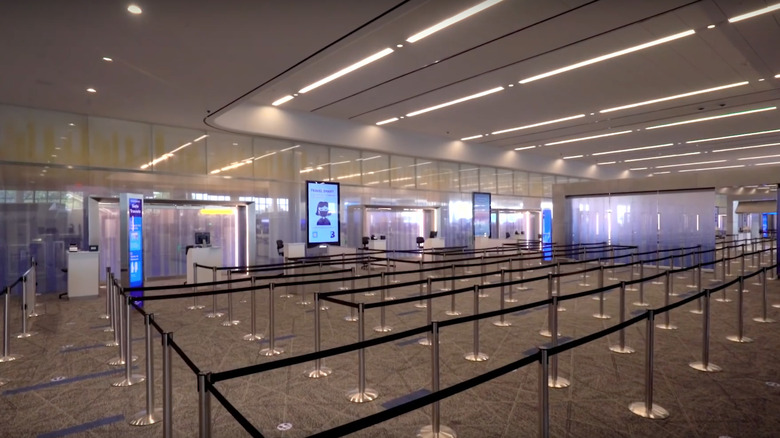
Long lines at TSA security screening appear, turning the nascent vacation into a serious downer. Getting through screening can take 30 minutes or more. After the experience, you might feel exhausted, and you haven't even got to the gate yet! That's hardly a positive way to start a vacation. However, TSA screening doesn't have to be the Herculean ordeal that it's often perceived as being. With a little bit of planning and some simple, logical fixes, getting through the security at a U.S. airport can be quite straightforward and surprisingly painless. Just what you need to start your vacation off on the right foot.
Don't wear loose, flowing, or sparkly clothing

Being comfortable on a flight is crucial. After all, the vast majority of us are corralled into a tiny space and can't move much for extended periods of the flight. Wearing clothing that doesn't bunch up, crease in awkward places, cinch painfully and doesn't itch can make the flying experience a little less painful. Such clothing might include big dresses, long flowing skirts, and cargo pants or shorts. The problem is that these are also the kinds of clothes where passengers can easily hide things, as they have plenty of space (or multiple pockets) where items can be seconded. You might think that these are the perfect outfits for a flight, but wearing them likely means an increased risk of being searched or patted down.
Sparkly clothing, which might contain metallic elements, can also sometimes trigger the scanning machine, resulting in you undergoing a separate frisk. That will only add time to your screening procedure, and what's the fun in that? Avoid these experiences by foregoing the sparkle fit and dressing for convenience instead of style.
Minimize metal

It's not just sparkly clothes that can set off literal alarm bells. Jewelry can also be a contentious thing to wear during TSA screening. Even then, the parameters are a little fuzzy. Not all jewelry needs to be removed at the security check, and people wearing wedding or engagement rings can often keep them on while they deposit their other belongings into the screening bins. The same goes for earrings, which can typically be left in while passing through the scanners. But if you plan to wear large, chunky items or have many pieces of jewelry, there is a good chance that you will be asked to remove them and place them in a bin for separate screening.
The easiest thing is not to wear them at all. However, fashion is fashion, and sometimes the outfit isn't complete without a handful of glistening accessories. This can be anything from broad silver bangles to shiny brooches and hair pins. Another metal accessory to also consider removing ahead of time is body piercings. They may not be visible to the naked eye, as piercings are often hidden under clothing or, in the case of tongue piercings, behind sealed lips. Nevertheless, the metal detector or scanning booth could pick them up when you pass through. And if it does, you'll be sent back to remove them.
Follow the rules for liquids and powder
Any frequent flier will be all too aware of the 3-1-1 rule. This guideline was introduced in 2006 following a foiled terrorist plot to blow up a transatlantic flight using liquids brought onboard. Fliers can transport liquids in their carry-on luggage, but each container can carry no more than 3.4 fluid ounces, and all the containers must fit into a transparent quart bag. Strangely, you can get through TSA screening with ice, but that is another story entirely. For many years, the quart bag had to be removed from a passenger's carry-on and placed in a screening bucket, but nowadays, passengers can generally leave them in their case.
While the relaxation of this requirement has helped speed up screening a little, the overarching rule remains. Bringing liquids (this also includes creams and gels) in excess of 3.4 fluid ounces will definitely slow you down — you'll probably have to dispose of them. This restriction might soon become a thing of the past, with some airports around the world planning to remove the limitation, but it remains in place at the time of writing. What might not be as familiar to fliers is the measures placed on powders, like make-up. Travelers can pack large make-up palettes and powders in carry-on luggage, but they may require extra screening, which will add time to the process. The TSA recommends keeping powders to 12 ounces or less.
Get TSA PreCheck
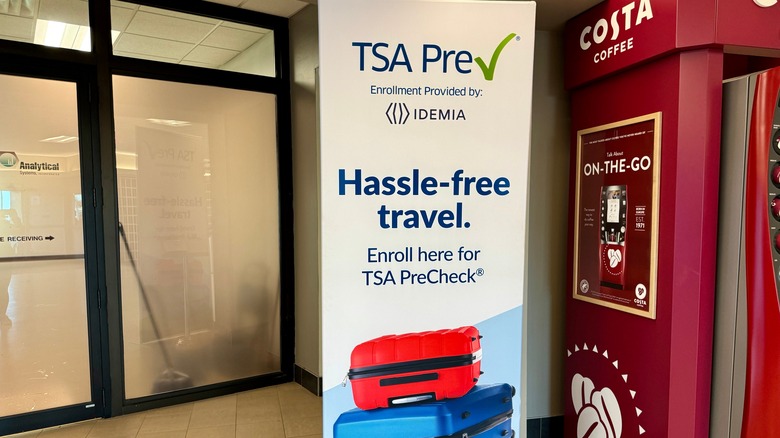
It costs a chunk of change — just under $80 for five years — but this TSA-approved amenity can drastically slash your screening time at an airport. Enrolling in TSA PreCheck requires completing an application online, followed by an interview at a TSA center. It isn't a lengthy process, as the interview only lasts about 10 minutes, but it does require that you are organized and can set aside time to visit the enrollment center. You'll need documentation showing proof of who you are and something showing that you are a U.S. citizen or permanent resident.
A handful of other questions will establish that you aren't a newly released felon or wanted for any crimes — basically, a standard background check that speaks to your recent history. In essence, it's no more testing than a typical job application, the only difference being that you are doing it to help you travel more efficiently. Once you are enrolled in TSA PreCheck, you are able to go to a dedicated line, and you don't have to remove electronics or take off your shoes during screening.
Use the MyTSA app

A frequent fliers know, the rules governing what can be taken onboard and what can't (and in which bag) are fluid, ever-changing parameters. Large bottles of liquids were once commonplace in carry-on luggage. Cigarette lighters were allowed, then banned, then once again permitted. Cooking spray is banned on check-in and carry-on bags, as are Christmas crackers (popular in the United Kingdom). Curling irons are allowed in carry-on luggage under certain circumstances but are banned from the hold.
What is and isn't allowed onboard is constantly being amended in light of developments in technology, screening advances, and criminal threats. The MyTSA app — produced by the source of all the rules — is updated with all the latest guidelines, so fliers can trust that the information on it is timely and accurate. Consult the app, and you'll know exactly what you are allowed to bring onto the plane and where it needs to go. This will help you speed through TSA screening quicker, safe in the knowledge that you have placed items in the right type of case and left any prohibited ones at home. More than just a packing tool, the app also features invaluable information about your flight, general conditions at the airport, how busy the lines are likely to be, and whether the airport features TSA PreCheck.
Put away superfluous documents
A trip to the airport is one filled with lines and checks and more lines and more checks. It can be incredibly tedious but also a little nerve-wracking, with passengers sometimes unsure when to present what and whether they have the right paperwork at each point along the process. It's not uncommon to see people brandishing sheaves of paper when they are checking in at the airline counter or as they approach the TSA agent. However, not everyone needs the same paperwork; having the wrong one at screening will slow down the process.
At the airline counter, counter staff confirm that your name matches the ticket, that you have the right travel document to get you where you are going (state ID for domestic travel, passport for international), and the necessary visas or clearance documents to allow you entry. The TSA agent won't look for visas, or where you plan to stay at your destination, so there is no point presenting any of this to them. They don't need to see your flight booking confirmation or pass for the business-class lounge. So just give them your travel document and boarding pass, and take off hats and sunglasses beforehand — this will help you speed through the TSA checkpoint just before the actual bag screening. It is important to note that from May 2025, fliers will need Real ID for state identification at U.S. airports.
Have your large electronics ready
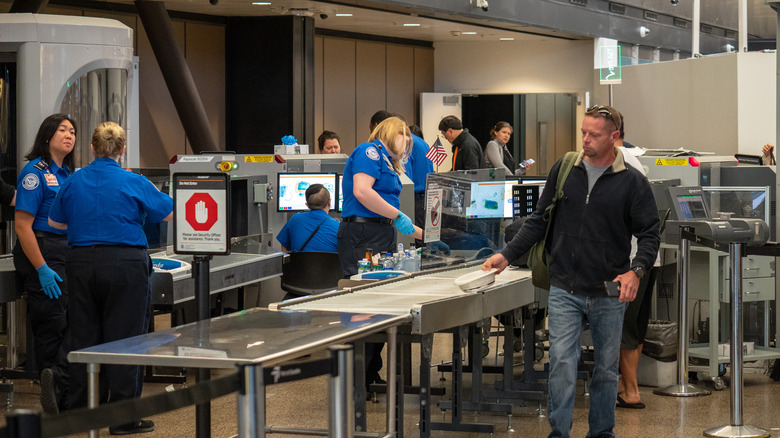
By now, it's evident that the TSA places a slightly greater focus on specific items in your carry-on. These include liquids that have to sit within very specific limitations, sharp objects that are not allowed (how many people have lost nail clippers because of this rule?), and large electronics. Since the middle of 2017, the screeners at U.S. airports have insisted that any electronics larger than a cell phone — tablets, laptops, e-reading devices, large cameras, small gaming consoles, and more — must be removed from carry-on baggage and screened separately. They have to be placed in a bin with nothing above or below them so that proper screening can be adequately conducted. Interestingly, items like electric toothbrushes and hair dryers are excluded from this requirement.
When it comes to your turn to be screened, don't find yourself reaching deep into the bowels of your case, trying to pull out your laptop and tablet, spilling your clothes and toiletries all over the airport floor in the process. Be sensible about where the electronics are stashed because you know that you will have to remove them. Telling a TSA agent that they are stuck way inside your suitcase won't dissuade them from asking you to take them out, so don't even try this excuse. Make sure all electronics are close at hand — maybe in a special zipped compartment that can be effortlessly accessed — and can be speedily retrieved.
Wear shoes that are easy to remove
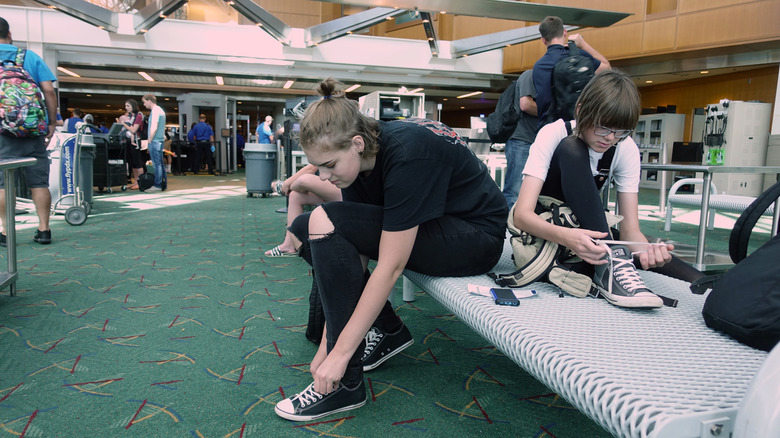
At airports up and down the country, people take their shoes off, plop them into the bins, and paddle along the terminal floor barefoot or in socks before moving through the scanner. It's a pretty universal requirement that shoes have to be removed — this all started after the so-called "shoe bomber" Richard Reid tried to blow up a transatlantic flight in 2001 using explosives hidden in his shoes. Now, "shoes off" is an accepted part of the airport screening experience, though some people can avoid doing it.
As discussed earlier, passengers with TSA PreCheck — and their children going through with them — can pass through screening with their shoes on. Also, seniors are often allowed to keep their shoes and jackets on (most passengers are asked to remove both). For the rest of us, having shoes that are easy to take off and put back on will make the screening process zip by a little quicker. Don't wear boots that go up to your knees or thighs or footwear with long laces that take an eon to undo. Not only will you hold up yourself but also the passengers behind you, which will only create more stress for everyone.
Use time in the line to your advantage
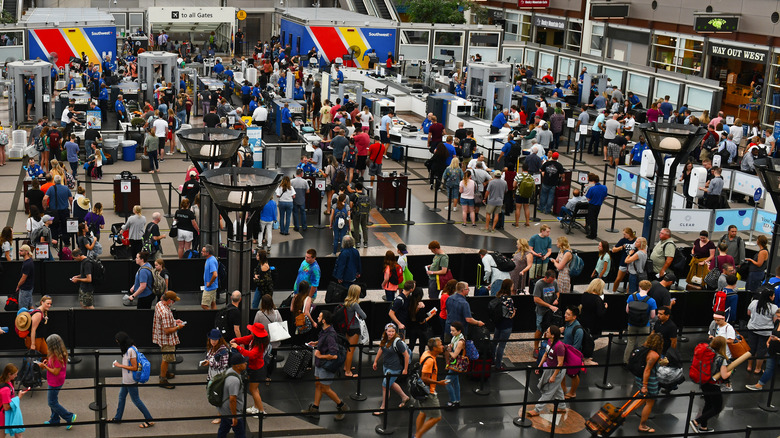
You can prepare ahead of time, pack your bag wisely so certain things are easily accessible, and ensure that banned things are left behind. However, there is a chance you will be stuck in a line for screening, and much of that time will be spent shuffling forward at a snail's pace while dragging your luggage along. Plodding along like a zombie when you could be exploring the shops or getting a bite to eat isn't exactly the dream. But that time doesn't have to be dead time, wasted moments that you will never get back.
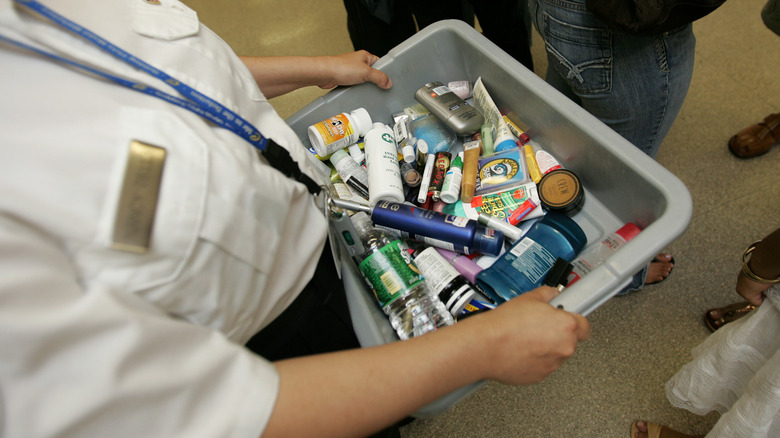
Yes, the snaking line will be boring, something that you will happily forget once it's over, but you can also use that period wisely. As you wind around the line separators, seeing the same faces over and over again, remove your belt, empty your pockets, take off any large jewelry, slip out of your jacket, and put all these items in your carry-on luggage. This ensures they are easy to keep track of, as opposed to them clanging around a screening tray. In addition, be sure to empty your pockets completely — that includes tissues or a handkerchief, even if neither will set off a scanner (they might get you patted down). You should also have emptied your water bottle, either by drinking or disposing of the contents, so that you can take the empty bottle through security.
Fly premium
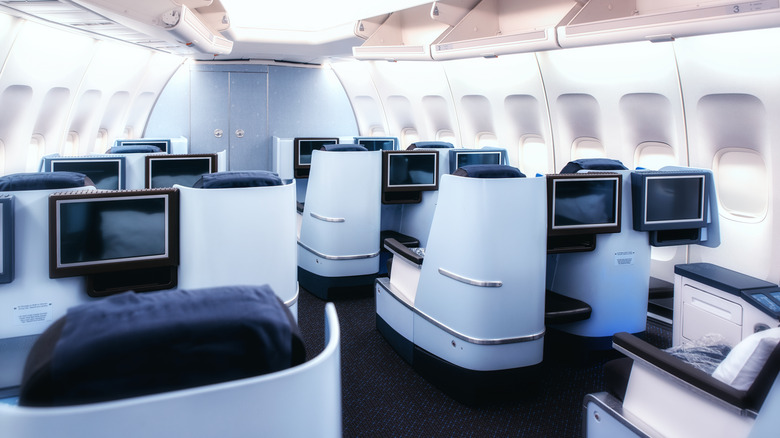
Of course, it costs more, but purchasing a premium-class plane ticket brings plenty of perks. You have a separate line at check-in at the airport terminal, which is usually noticeably shorter than the line for economy seats. Baggage allowances are typically more generous for business- and first-class passengers than for coach, and you might even be allowed to check in two bags for free. You'll likely get a pass for the airport lounge for that airline, where free snacks, food, drinks, reliable WiFi, and even showers are sometimes available. And to sweeten the deal even more, you might be ushered to a dedicated line for security screening, a section that is off-limits to the vast majority of coach passengers.
These luxuries come at a price. Business-class fares can cost as much as five times (or more) that of economy. If splurging on business to save some minutes at screening is important for you, then go for it. If you decide to stick to economy, you can also find a way to cut some precious minutes off your experience with the TSA staff. After the TSA checkpoint, where your documents are checked, look for the shortest line for screening. You don't have to automatically go to the one in front of you, which is what many passengers assume.
Book a screening slot
While TSA PreCheck can get you to a more brisk screening line and flying business class can help you bypass the crowds, these both come attached to a price tag you might not want to pay. Luckily, these aren't the only options for getting through screening quicker. At some airports around the country, you can reserve a pass straight to the screening line, and these passes are either nominally priced or free. Yes, you read that right; free, gratis, complimentary, zero dollars! At New York's LaGuardia Terminal B, the program is known as BFast — presumably because it's only available for flights in that terminal.
This one isn't free, but it's certainly not as costly as enrolling in TSA PreCheck or springing for a premium fare. Costing between $15 and $20 and available for purchase online, the BFast pass lets you go straight to the front of the security checkpoint, where an agent looks over your documents. At Orlando Airport, MCO Reserve is a similar program, but there is no fee to use it. You choose a certain time for your screening and then head to the TSA checkpoint agent at that time. The slot must be booked ahead of time, a maximum of seven days beforehand, and is only available for screening between 5 a.m. and 5 p.m. at all three terminals. There are also similar programs at major European airports, such as London Heathrow.
Check your passport cover
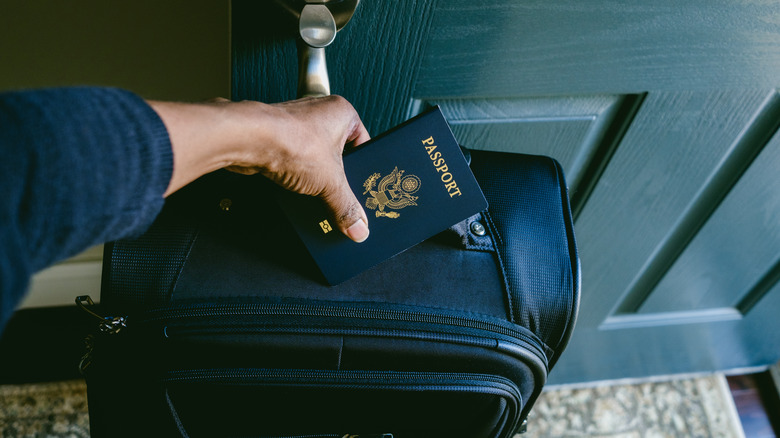
Even before you start dreaming of your trip, researching destinations, and heading to the airport, there is an easy way to see if you'll be able to get through screening quicker. If your passport cover has a small camera symbol on it, you might be able to zip through TSA. You might have looked at the passport and just thought that the small, unobtrusive symbol was just some decoration or a flag that signified some sort of international travel cabal — you might not even have noticed it at all.
You'll definitely have one on any new passport you get. If you don't have a passport, we recommend you apply for one as now is a great time to do so — after all, it's easier than ever for first-timers to get a passport now. What the camera symbol actually means is that your passport is biometric, so it has access to more information than your name, date, place of birth, and other basic data. Such passports contain a microchip that links to biometric data about you, making it easier for TSA agents to verify your identity. This makes the security screening process quicker. It also helps to stop counterfeiters from copying your passport or stealing your identity.